



Photobucket Photobucket Photobucket Photobucket Photobucket
Showing posts with label DIY. Show all posts

Monday, March 12, 2012

Felt_ Flowers_ Chevron & a Wreath


Last week I completed this wreath for my front door. And actually, after finishing it couldn't decide if I really wanted to hang it outside or not. It was so stinkin' cute I kinda wanted to have it inside to see.
But I went ahead and opted to hang it on the door like I planned to do from the start. 
I'm thinking I could eat it though!

Originally, I got this idea from Pinterest when a friend pinned this wreath.

I loved the black & white_ the bright colors_ the chevron_ pretty much everything about it and couldn't wait to get busy making one for myself! So I switched it up a bit and what follows is a quick tutorial on what I used and how I made my version.

Supplies you will need:
1~ 16 inch wreath
1~ roll of black yarn
1~ roll of white yarn
Felt in all different colors. I used about 16 different colors.
Hot glue
Total cost to make: $12

I didn't do a good job of taking step by step pictures so if you have any questions just ask and 
I'll try to explain in more detail.

First you'll need to mark off sections on your wreath to know where and when to stop your color to then pick up with the next color in rotation. Mine were a little over 1' sections making sure that I would not end up with the same color side by side.


Next I made a bunch of felt flowers in different shapes/ sizes. If you've never made a felt flower before just google how. There are a ton of tutorials out that are amazing at showing you how.

With some cardboard I drew and cut out a chevron stencil to trace onto each piece of felt.


  Then after making all of my flowers and cutting out all of the chevron pieces I just hot glued everything. Matching up the colors like I wanted with the chevron, then placing the flowers and gluing once the chevron pieces had all been glued down first.


Now let me tell you what I would do differently after making my first one.


The chevron needed to be wider so that it wrapped around the wreath more.
I would of liked it to cover more on each side/end but it was something I didn't realize until I had gotten them on there. So I had to just go with it. Looking at the wreath head on you really don't notice it. It's only after you get upon it that you can tell. 

I seriously love it though. It's definitely a happy wreath.
That ba-boom piece that I can't wait to see as I pull into the driveway. 
Because wreaths and felt and flowers and chevron and color all help make life a little sweeter.


"You will miss what matters most in life if you are only ever looking 
for the spectacular"  

Linking up with Laura
heather.


Friday, March 9, 2012

Before & After Painted Hutch

Some of you may remember what my hutch looked like last year when i got it. 
It sat that way for a year but it doesn't look that way anymore. 
My hubs man did an amazing job painting it and i am so pleased with the outcome. 

This picture is from 2004 when we first bought our piece and what it looked like. 
I'll save the story for another time but it was a gift that hubs picked out and hid in our garage for 
2 weeks without me knowing. How he managed to pull it off I'll never know bc I'm hard to surprise. 
But he did and it was awesome-sauce.


Fast forward years later as my style has changed and evolved, i walk into Goodwill 
one day and find/purchase this piece for $50. 


We took the the black top piece off and painted it to use in the Craft room. 
It now holds fabric and lots of miscellany things.


3 coats of paint later and this is the hutch now.


We replaced the wooden knobs with clear crystal ones from Hobby Lobby.
They were running their 50% off sale and so i got them for $2/piece.


My most favorite part of the hutch is the etched glass and the back board done in gold.
That was what i payed for and saw in this piece... character. 
I'm still working out what i want to have displayed in it. 
For now I 'm just enjoying how clean and purty it is.
Happy Friday Ya'll!
heather.


Friday, February 3, 2012

Room to Create


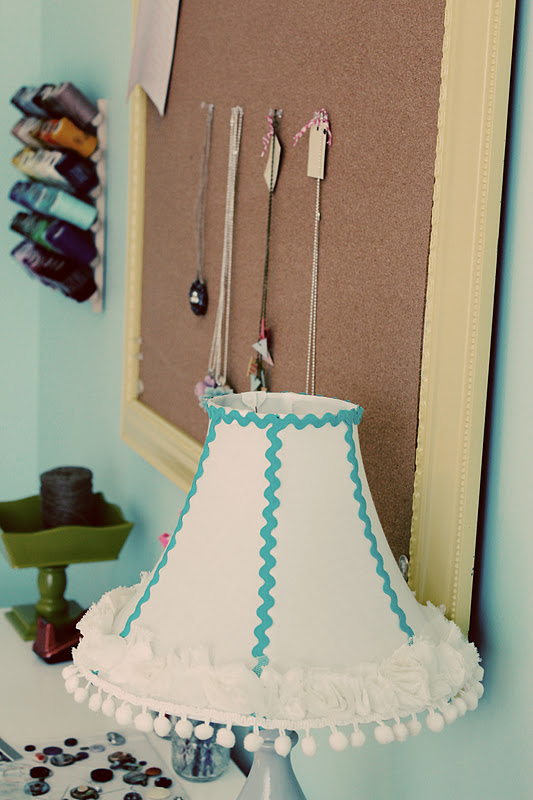
I’m fighting the perfectionist side of me big time this morning in that I didn’t want to post the final photos of my room until it was complete. 
Until all the clutter was put away in proper places, on some bookcases_ 
cute framed prints hung on the wall_ a rug put down that would bring it all together…. I could go on and on but let’s face it, I’m not sure when I’ll be able to get all of that. 
And for now, this is what I have and this is what it looks like… clutter and all. :)


The color is a PPG color called Serendipity and at first sight I really felt it was too bold/ dark. It's a pretty aqua color but I was originally thinking of something a little lighter…It wore on me though, and I wonder now why I even had an issue with it. I do the same thing with my hair. When I first see the new color I’m like ooooooooh, it’s pretty bold and then after a week I’m like it’s fine. 
Cray, cray…i tell ya!


Jode has been a painting little machine man. He painted 2 desks_ a frame_ the lamp_ dream sign_ 2 shelves_ and painting takes time, doesn’t it? I get a tad impatient and want it dry and ready to go but it doesn’t work that way. The weather plays a huge part in it as well as having the right equipment. I have to admit, I’m a little fearful of doing our kitchen. I just know how big of a job it’s going to be…. Worth it_ but just not anticipating it really well.


Did I tell you that I purchased this table with 3 chairs at the Salvation Army about 5 months ago for $45? At the time I wasn’t sure what I was going to do with it. I just knew that I wanted it bc of it’s character. It has a leaf that extends it out too, but now I think I've found the perfect spot. The chairs I use over in our dining room.


I’m so thankful for this space to dream_ create_ and make a mess in.

Hope you have mucho fun this weekend, too. Whether you do something or nothing_ clean or mess things up_ happy weekend to ya!

heather.

Monday, January 23, 2012

Uwin... {Use What is Near} Curtain DIY

Since moving into our home there are still windows that stand bare & exposed... they're naked = they have no curtains hanging on them. And not because i don't want curtains hung. They're that way because curtains are expensive and i want to get what i really want. So i wait until i can do so.

While we're talking about this i just thought of why they may call them "window treatments."
I'm thinking because they can either be a treat for you...to look at. Or not, maybe. I dunno. What i do know is i want my"window treatments" to reflect who i am in some sort of way. And if it has pompom tassels they're sure to be a treat to me...

Later in the week i will hopefully be able to give the full reveal of the craft room but today we're talking about U winning. When you "Use What is Near" i have found it to be a win-win. And in the times where I've had little resources to work with is some of the most creative and resourceful. That's what happened to me this weekend.

I started thinking... hard about how i could make some curtains. What did i have on hand? How could i get them to be fun and creative since they'll be clothing my inspiration room windows. What could i take apart that I'm not using? And here's what i came up with.

I dug around the house and found this tablecloth purchased back at Christmas from Dirt Cheap that was originally from Target. Ya'll if you've never been to a Dirt Cheap or Hudson's, oh my. Can i just say it is the best of the best for finding bargains at yes dirt cheap prices. I think the stores go from Alabama and downward South. Crazy the things that you can walk away with there. Shoes for $1.99_ tablecloths for $5_ table runners for $3_ curtains for $5...just cray cray, i tell ya.

 I also found a pair of white tab top panels I wasn't using_ grabbed a remnant of polka dot fabric_ some pompom tassels_ annnnnd a red velvet grommet curtain that I had gotten a few years back from Dirt Cheap but had never used. 


I cut a piece of tablecloth and sewed it to the top. Cut a piece of velvet and hot glued it to the bottom because i wanted some extra length and added texture. Cut strips of the polka dot fabric and hot glued it to add some funkiness and then added some yellow pompom's.

And I'm not sure why but I always end up sprawled all over the floor with my things.


The curtain rod i had is like 12 years old... i'm not even exaggerating. It came from Wal-Mart years ago and i found it in a box in the attic. That pour thing has been through some moves....


I'm tickled pink with how they turned out and the best part is that i used things i already had on hand. I've been learning this lesson more and more lately. To first see if i can use what is near me that maybe i haven't given some thought about instead of purchasing something i may not be totally pleased with long term and having it be a waste. This weekend... iwon;)


The last picture was taken in the middle of the day with the sunlight coming through. Amazing the difference in lighting and how it changes the way the wall color looks:)


Funky_  homemade_ pompom tassel_ velvet_  curtains always makes life more lovely;)

Linking up with a bunch of great blogs.
Whipperberry


heather.


Thursday, October 20, 2011

Tourin' the Youngest & a Curtain Tutorial


Little by little we continue to fix-up and make our new house "ours".

By putting our fingerprints on it_ in it_ by weaving them through the walls as we paint, or on the floors as we scrub…
The people inside are what make up our home
of this I'm sure.
But this process of taking what the Lord has given and turning it back over in anyway that we can is exciting and fun and I can’t wait to see ultimately how He chooses to use it.
It will be a process that we’re in no hurry to finish.
We just want to take it one step at a time and do a little as we live... we haven't had that option since renting/leasing most of our lives.
So it feels nice to paint my sons' wall purple because he loves LSU...ha, kidding, I mean he would absolutely love that, but I told him we've got to find a happy-medium here.
That's the thing when they’re little, you can do their room really cute and such...but not so much as they get older and have their own likes/dislikes. They think they know what looks best and so i have to take the back seat with my great ideas and go with their great ideas and sometimes i have to bite my lip...hard, real hard...and just bare it..because after all it is their room and i want their creativeness to shine through.


Ok. anyways, moving on..youngest had a trundle that she
slept on until moving here. Her and middle shared a room and there
wasn't enough space for 2 beds so it worked perfectly.
She used that for the first couple of weeks and we knew we had to find her a bed. 
That.. and she kept reminding us that she didn’t have a bed and everyone else did. Craigslist is the bestest sometimes and we were able to find her the cutest kind
 of Pottery Barn-ish looking one.
Then came Target's hu-ge clearance in their bedding dept. and waa-lah her 
bedroom is pretty much completed on a very limited budget.
This is one of my fav things..the ruffly cotton sheets...pure sweetness..
and $4.94 from the Target clearance things.


For her curtains I bought a $5 twin flat sheet from Wal-mart and cut it in half.
I'm not big on measurements and in hindsight probably should have measured her windows or thought about getting a Full sheet for the extra width...but i was thinking cheapness and doing it for less and so the $5 seemed to be the better choice at the time. If you want more coverage I recommend going with the
Full instead.


Next i found Fabric tacks at Hobby Lobby and then i got 6yds of red pompom fringe and hot glued it onto the inside edges of the sheet.I was pleased with how it came out and $11 for cuteness window treatments isn’t too bad.


Now we're on to getting middle's room done. 
Then we'll do oldest's and lastly I'll think about me & hubs. 
Until then I'm just enjoying the process ...
Heather :)


Monday, September 26, 2011

DIY Chandy - Chandeliers

The choice between what color I should paint my chandy's was H.a.r.d.
I have trouble sometimes making that final decision. I like so many different color schemes that sometimes my decor, to me, can get all jumboggled{my made up word}. I think it has something to do with the perfectionist syndrome. Yes, it's a syndrome and I'm really, really aware of it...:)

I want it to be right the first time and not have to re-do or re-paint or re-hang. But it's just not realistic...like, I need to see it. And I may have to re-do the whole scenario if it's not working. So I had to really focus on what look I was trying to achieve and what worked with the accessories I already had. We decided to paint the chandy over the breakfast area a blue because I really like pops of color, here & there.. I'm incorporating a lot of robin egg blue throughout the house so this seemed to fit.

Before


We put a thin coat of primer on them first and then sprayed 2 coats of color. Hanging them in the tree made them easy to get under & around. And at one point we moved them into the garage_ and worked on them in there, too.


After


In the dining room we went with a yellow...swoon_ still just swooning over it.
I have pops of yellow in some pillows and my Anthro curtains so I pulled from those.


Instead of putting the candle looking bulbs back in I replaced them with round ones. 2 in a pack for like $2 from Wal-Mart. I think it gave it a whole new twist. 

The house came with all brass knobs/ hardware. So over the next few weeks we are working on getting them all painted. We've already done the ones in the guest bathroom and it seriously is amazing at the difference it has made. I'll keep you posted on what's next....

Because working with what you have and turning it into a statement piece in your home...always makes life a little more lovely.

Heather :)


Thursday, June 23, 2011

Unexpected Joy

It is so much fun to be able to make/create/craft something of your own, isn't it? 
There is such joy in creating.. for me it was an unexpected joy that came in the moving and making with my hands. Now I'm a doer... I don't want to just sit at a table talking about doing something_ I want to be a part of the "doing". 
Over the last year, I've really learned how much this truly makes up who I am.

Anyhow,  I'm lovin' all of the headbands out there lately but some days I'm like "can I still wear these"? Or am I too old? But then I'm like naaah...old is all in how you perceive yourself.
So here are a few of the lovelies I've been working on lately_


I could eat this color...:)


Heather :)